Create a canvas
A canvas is where you design a change. Give each canvas one topic, such as "Email customers when their review is published" or "Split the Order Service".
This page uses the example catalog from create-eventcatalog. Follow along with your own resources, or create the example catalog:
npx @eventcatalog/create-eventcatalog@latest my-catalog
cd my-catalog
npm run dev
Start a canvas
- Open Studio from the sidebar, or go to
/studioin your catalog. - The first time, Studio asks what to call you. Your name is shown next to your pointer and your comments.
- Choose New canvas, name it for what you're designing, and choose Create canvas.
Start from a diagram
You can also start from any diagram in your catalog. Open the diagram's menu, choose Open in Studio and name the canvas.
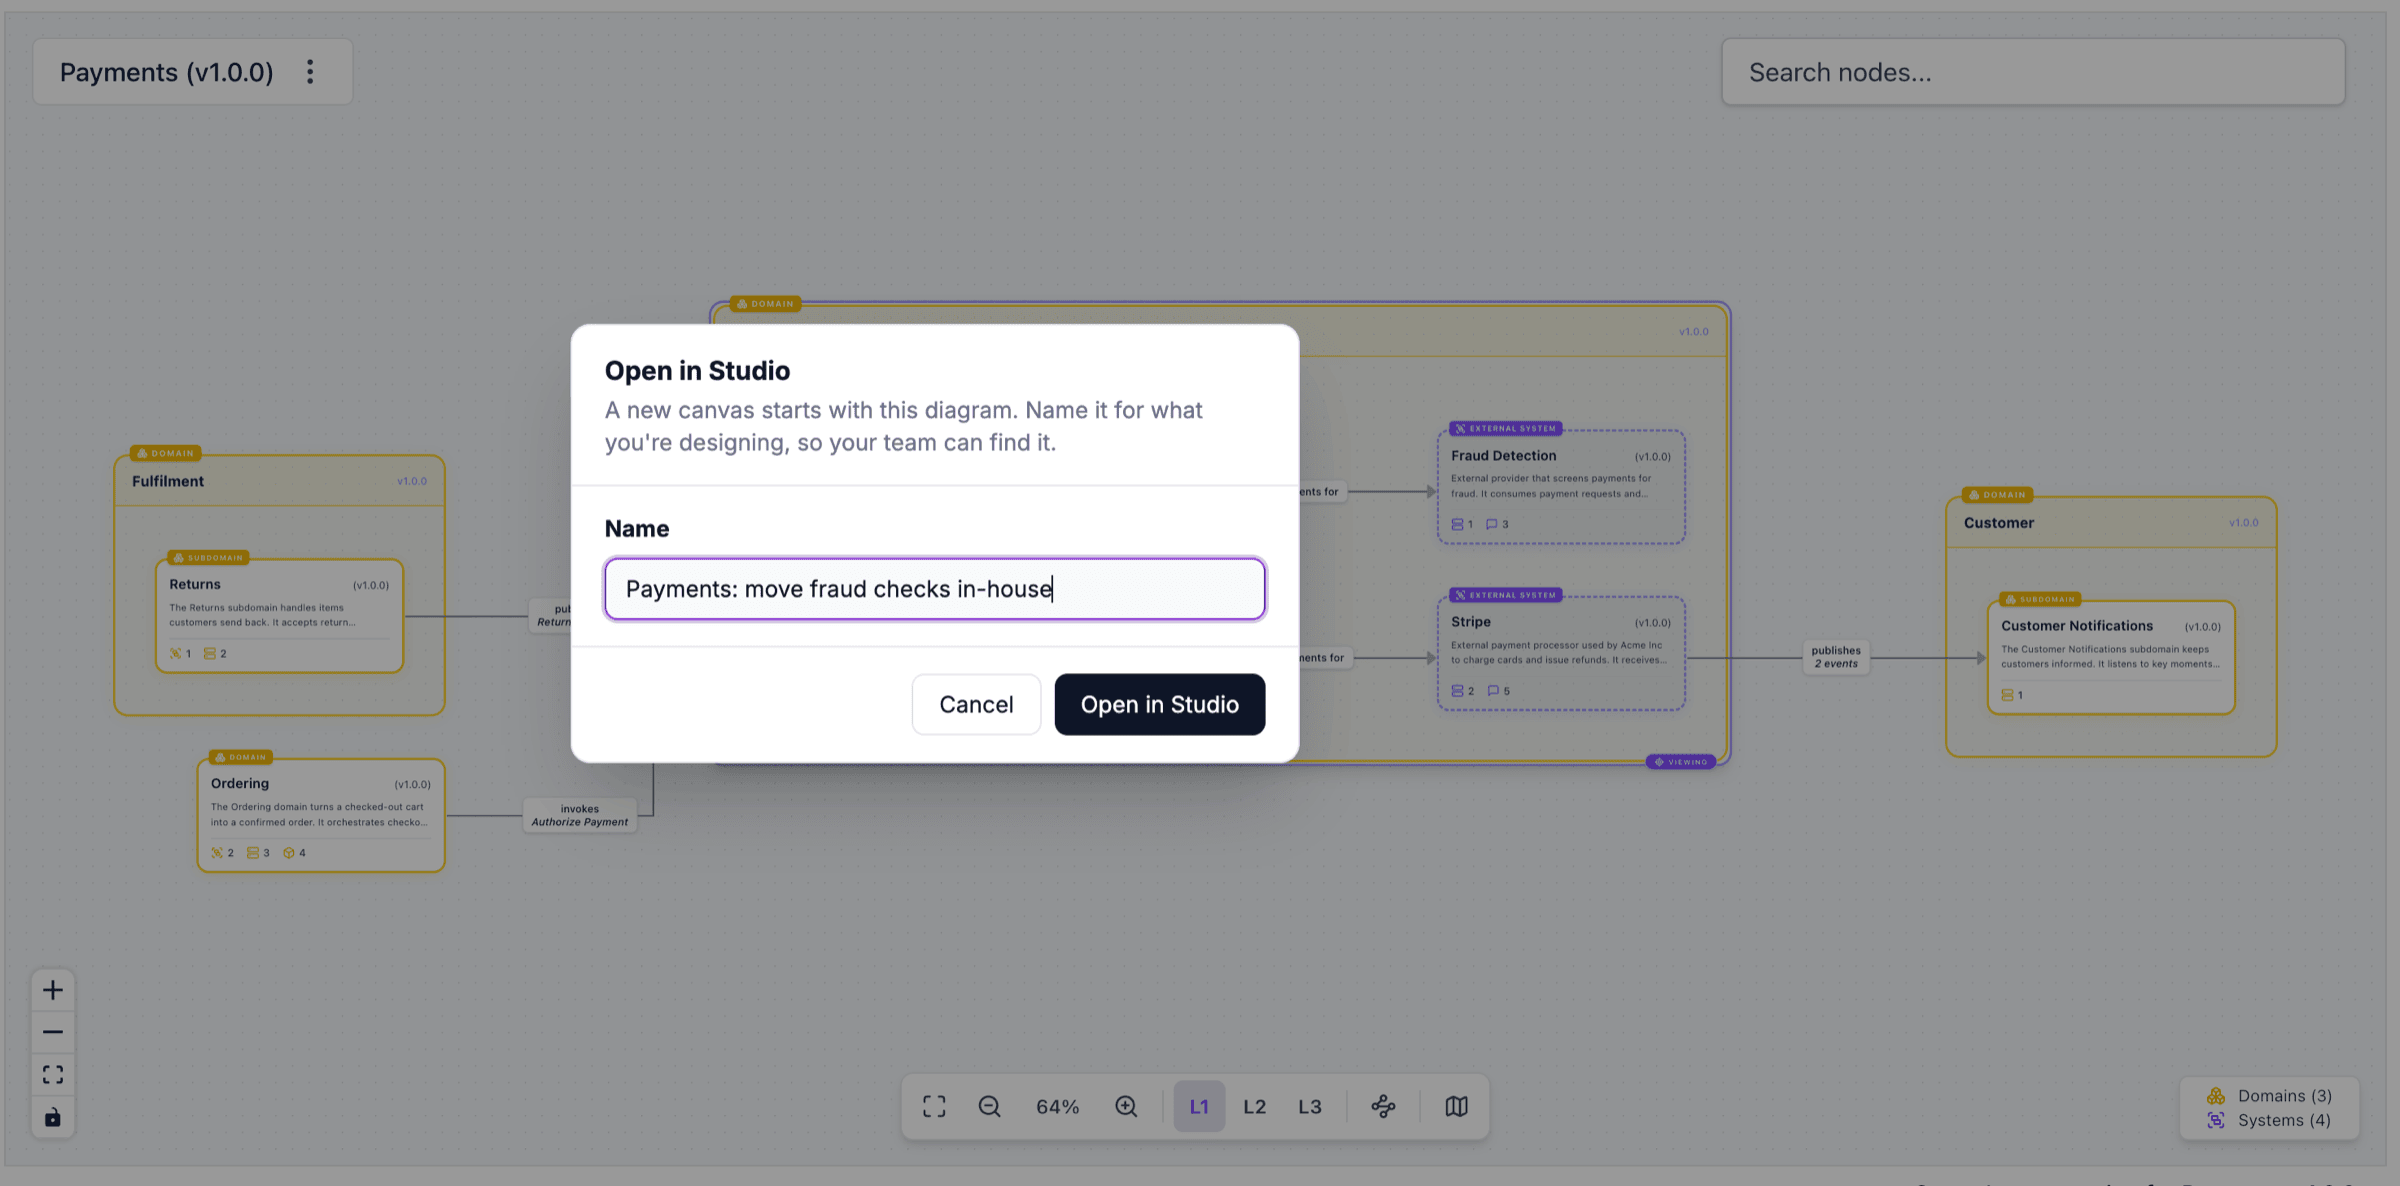
The canvas starts with the diagram's resources, their positions, their domains and systems, and their connections. Change it as you like. Your catalog doesn't change.
Add resources from your catalog
- In the palette, choose Catalog Resources.
- Search for a resource, for example
moderation. - Click it to add it, or drag it onto the canvas.
When you add a service or a message, choose what comes with it:
- Just the service: the resource on its own, connected to what is already on the canvas.
- With its connections: the resource and what it sends, receives and stores. Tick the groups you want.
For example, adding the Review Moderation Worker with only Messages it sends ticked adds the service and the two events it publishes, already connected:
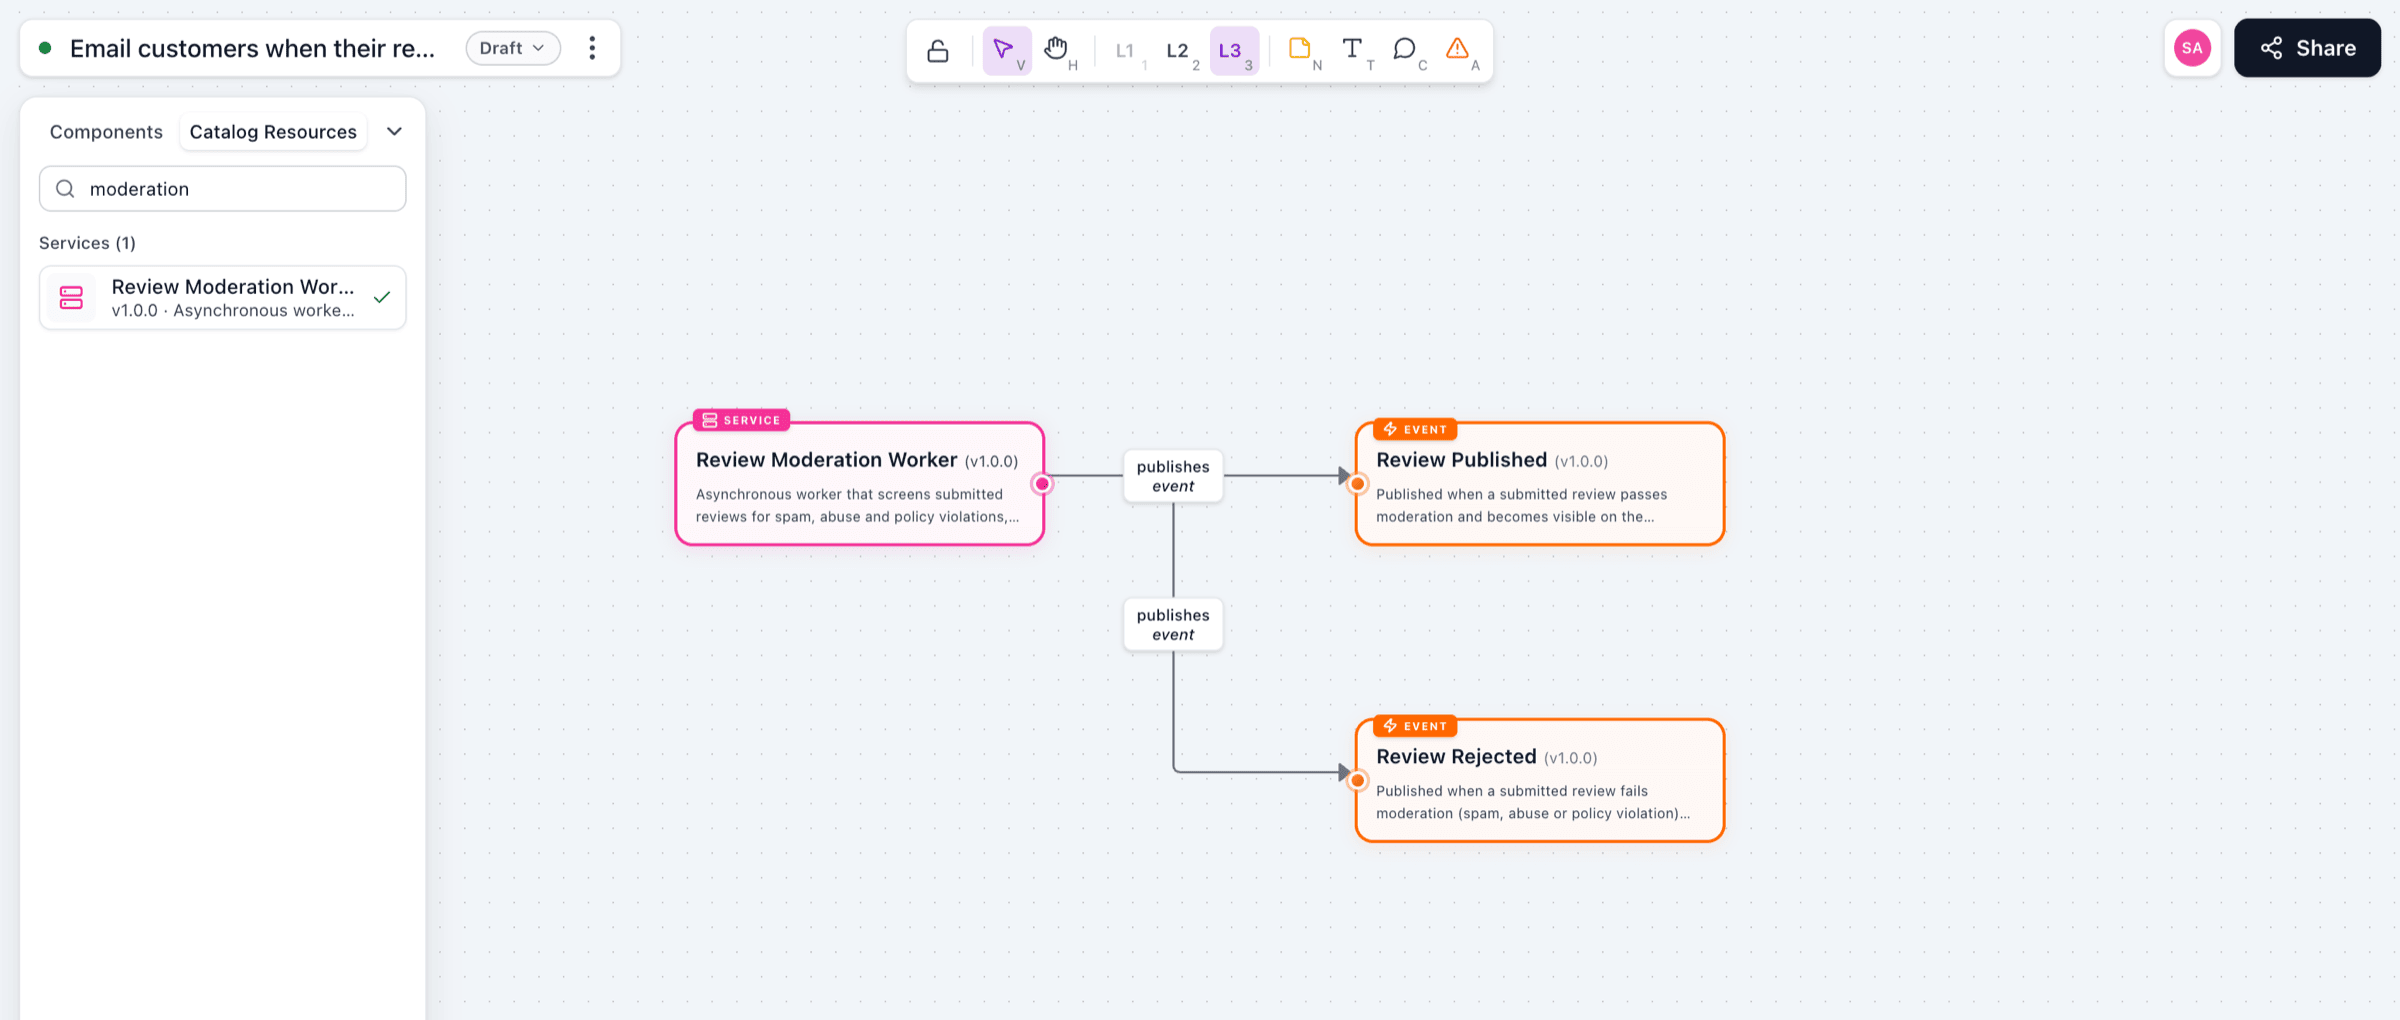
Catalog resources keep the name, version and summary from your catalog. To change them, change them in your catalog.
Add something new
Use the Components tab for things that don't exist yet, such as a proposed service, event or database.
- In the palette, choose Components.
- Click a component to add it, or drag it onto the canvas. New components start at version
0.0.1. - Double-click it to set its name, version and summary. Changes save as you type.
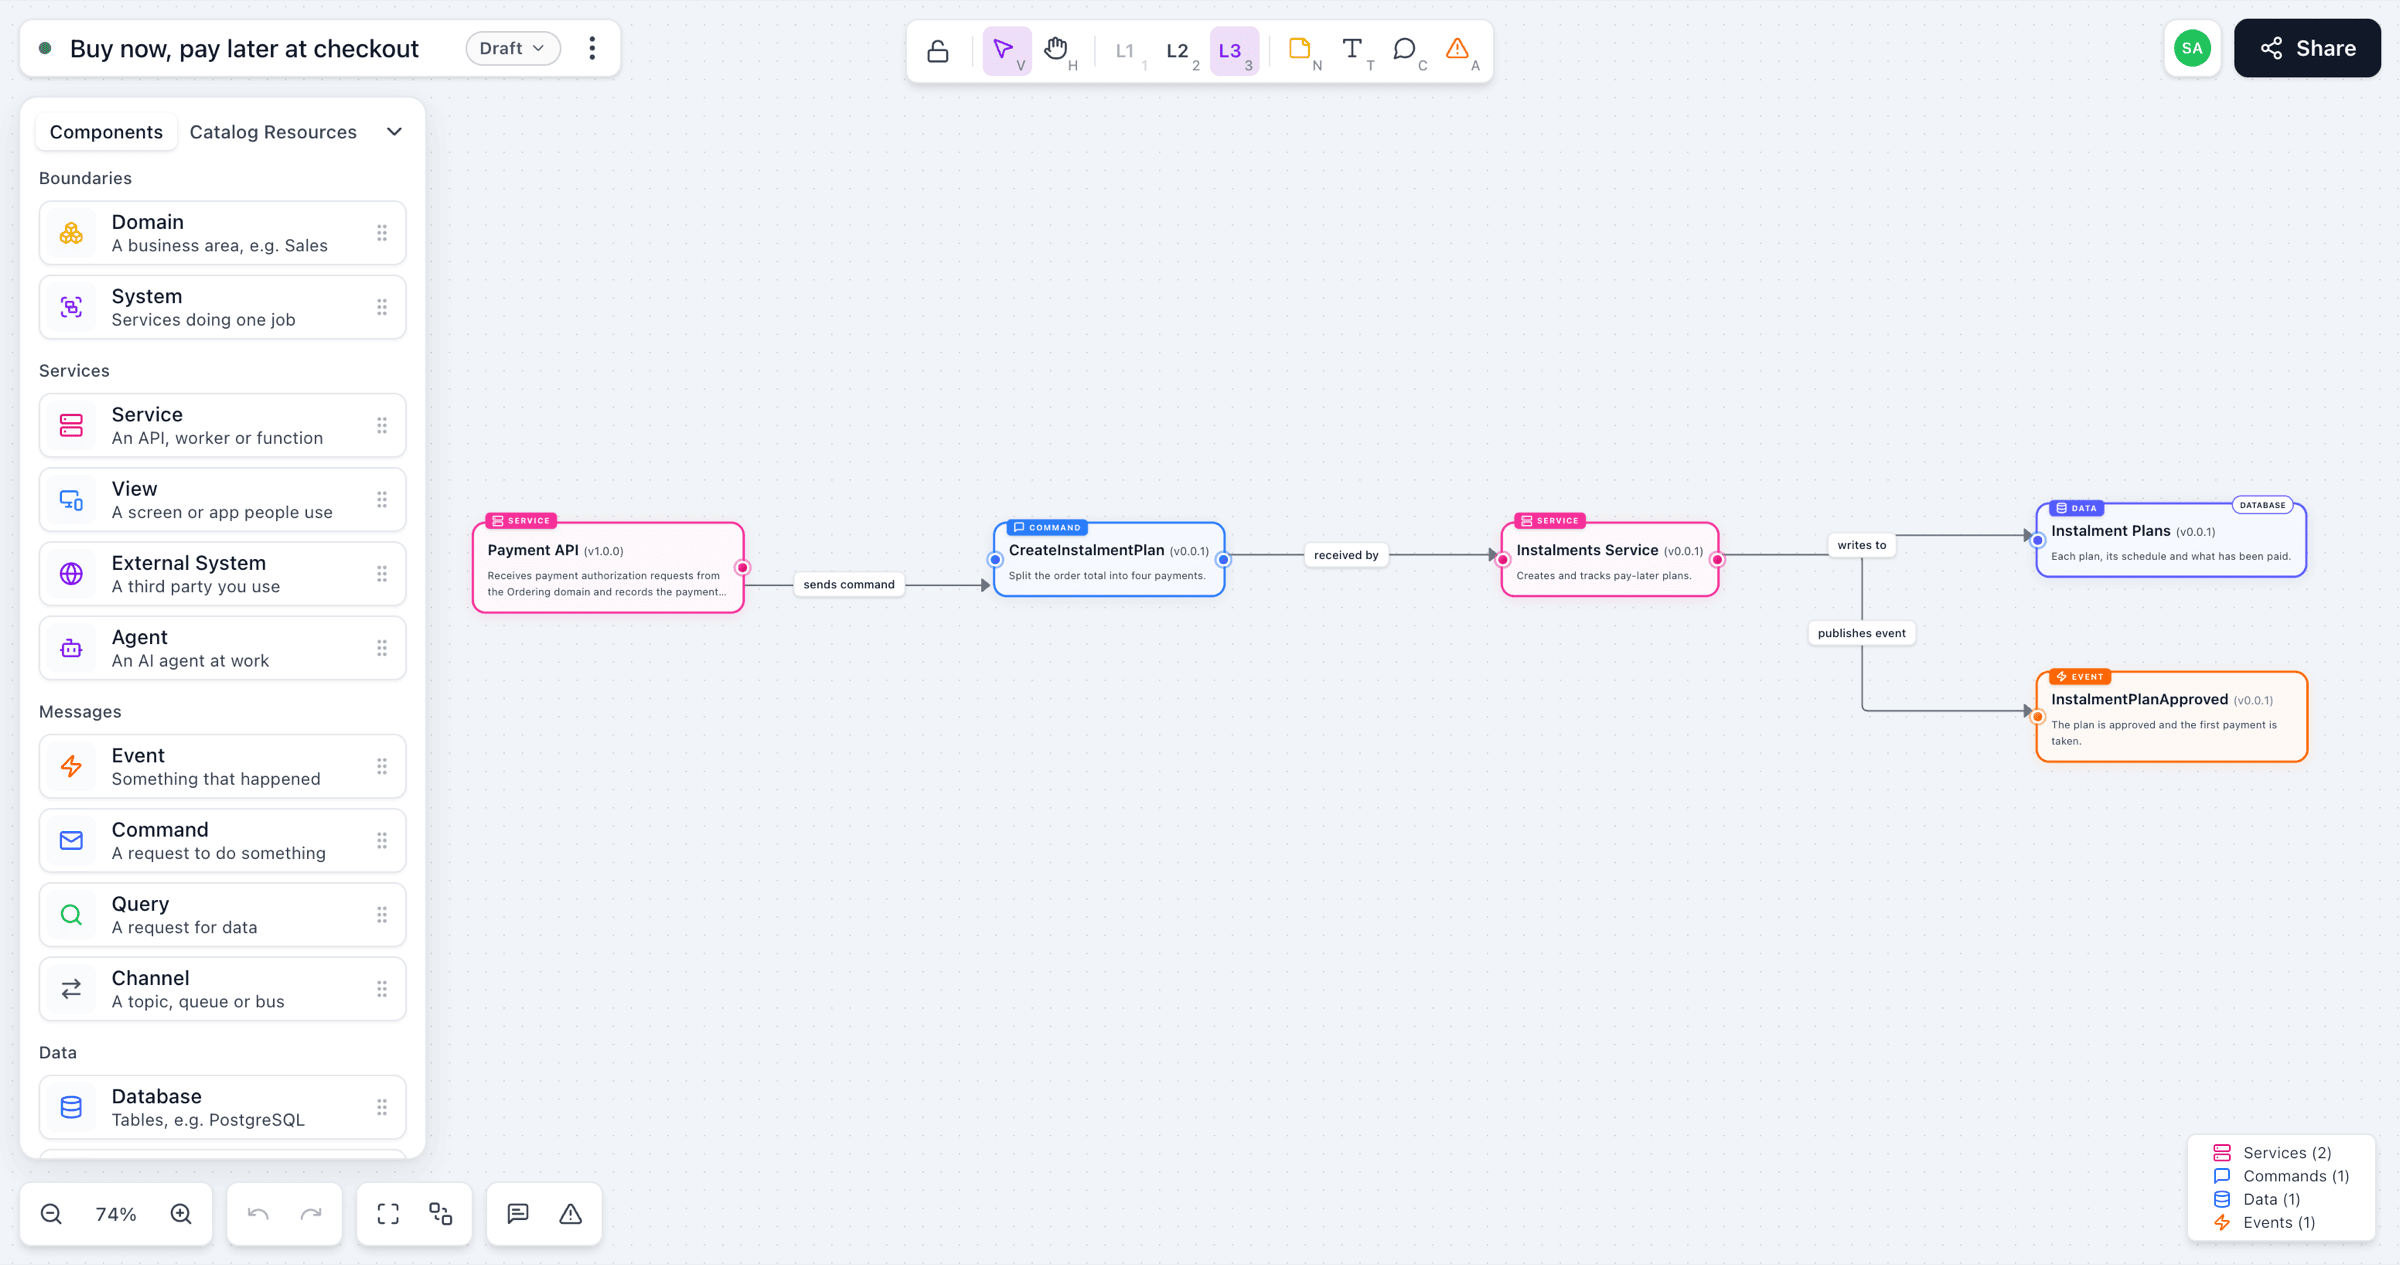
See the reference for every component.
Connect nodes
Drag from the dot on the edge of one node to the dot on another. Studio labels the connection with EventCatalog's wording.
For example, connecting the Review Published event to a new Review Emails service is labelled subscribed by:
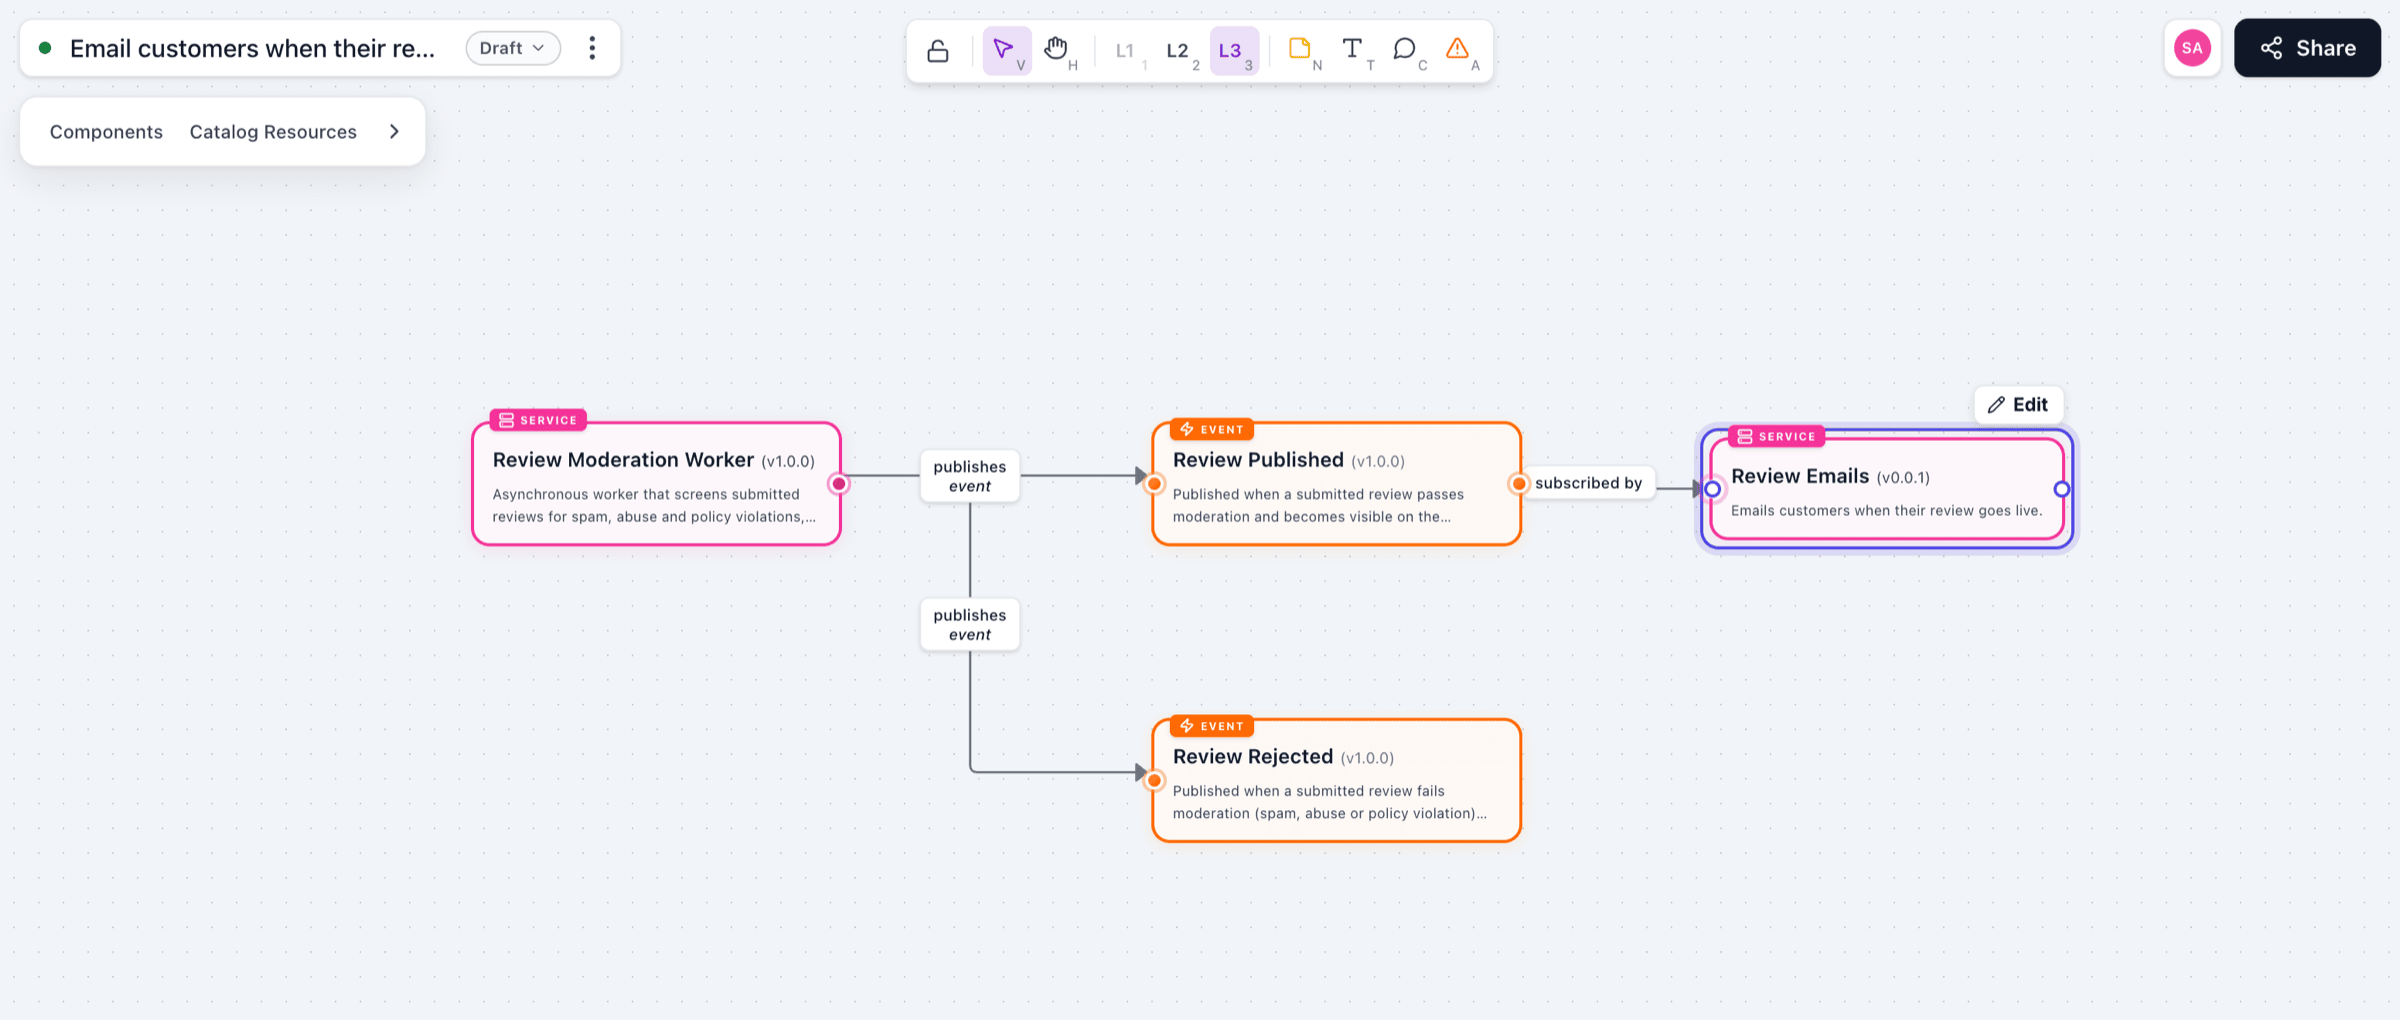
To put a node inside a domain or system, drag it onto the box and drop it when it highlights.
To tidy the whole canvas, choose Reorder diagram in the toolbar at the bottom.
Edit a node
Double-click a node, or right-click it and choose Edit details. The panel shows its name, version and summary, and what it connects to.
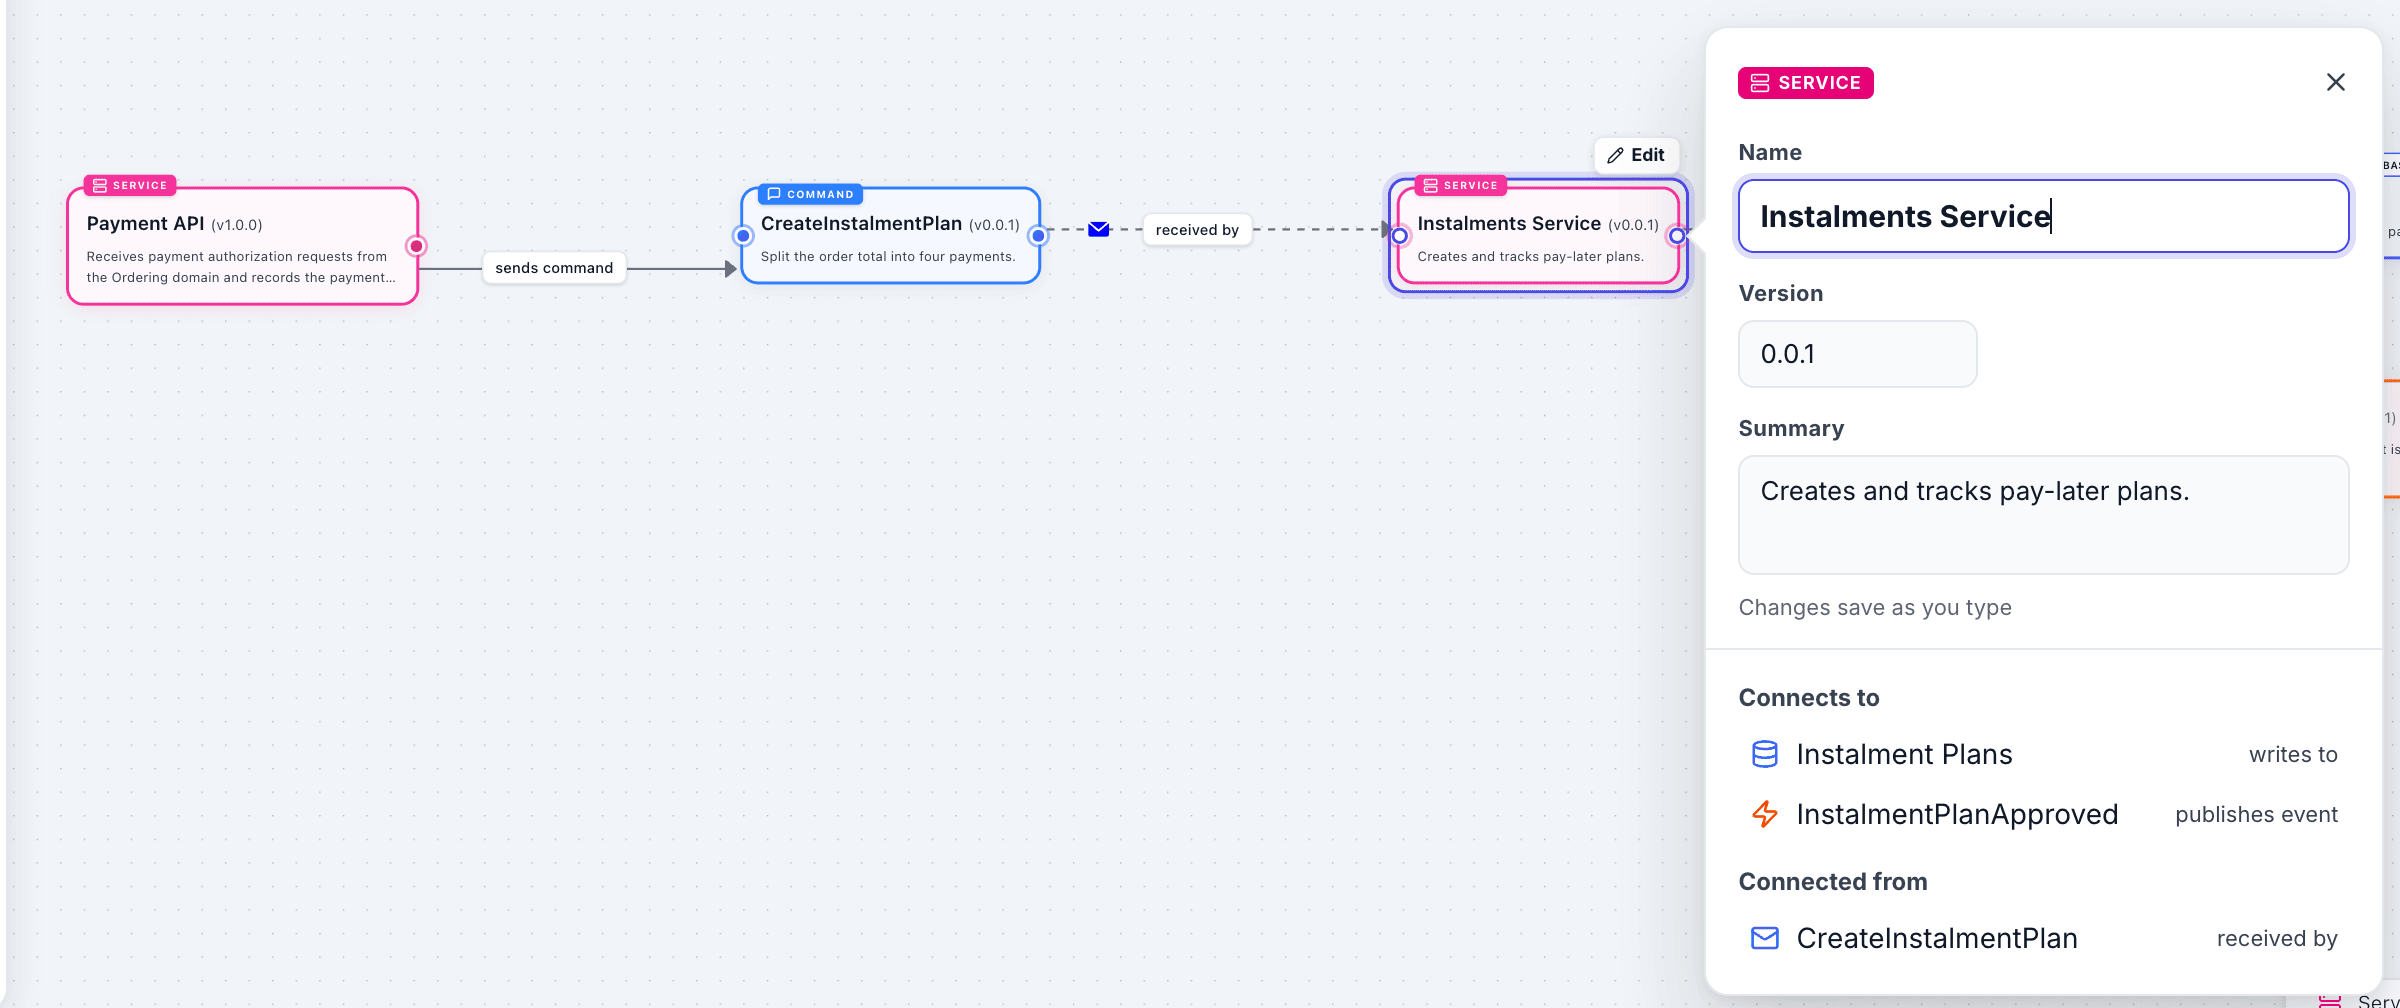
Right-click a node to comment on it, flag a hotspot, add a note, copy, duplicate or delete it.
Change the level
Choose L1, L2 or L3 in the toolbar, or press 1, 2 or 3.
| Level | Shows |
|---|---|
| L1 | Domains, systems and their relationships |
| L2 | Services and data stores |
| L3 | Everything, including messages and channels |
You draw at L3. L1 and L2 summarise it: at L2, messages fold into the connections between services, and at L1, services fold into their systems. Use L1 or L2 when you want to talk about the big picture, without every message.
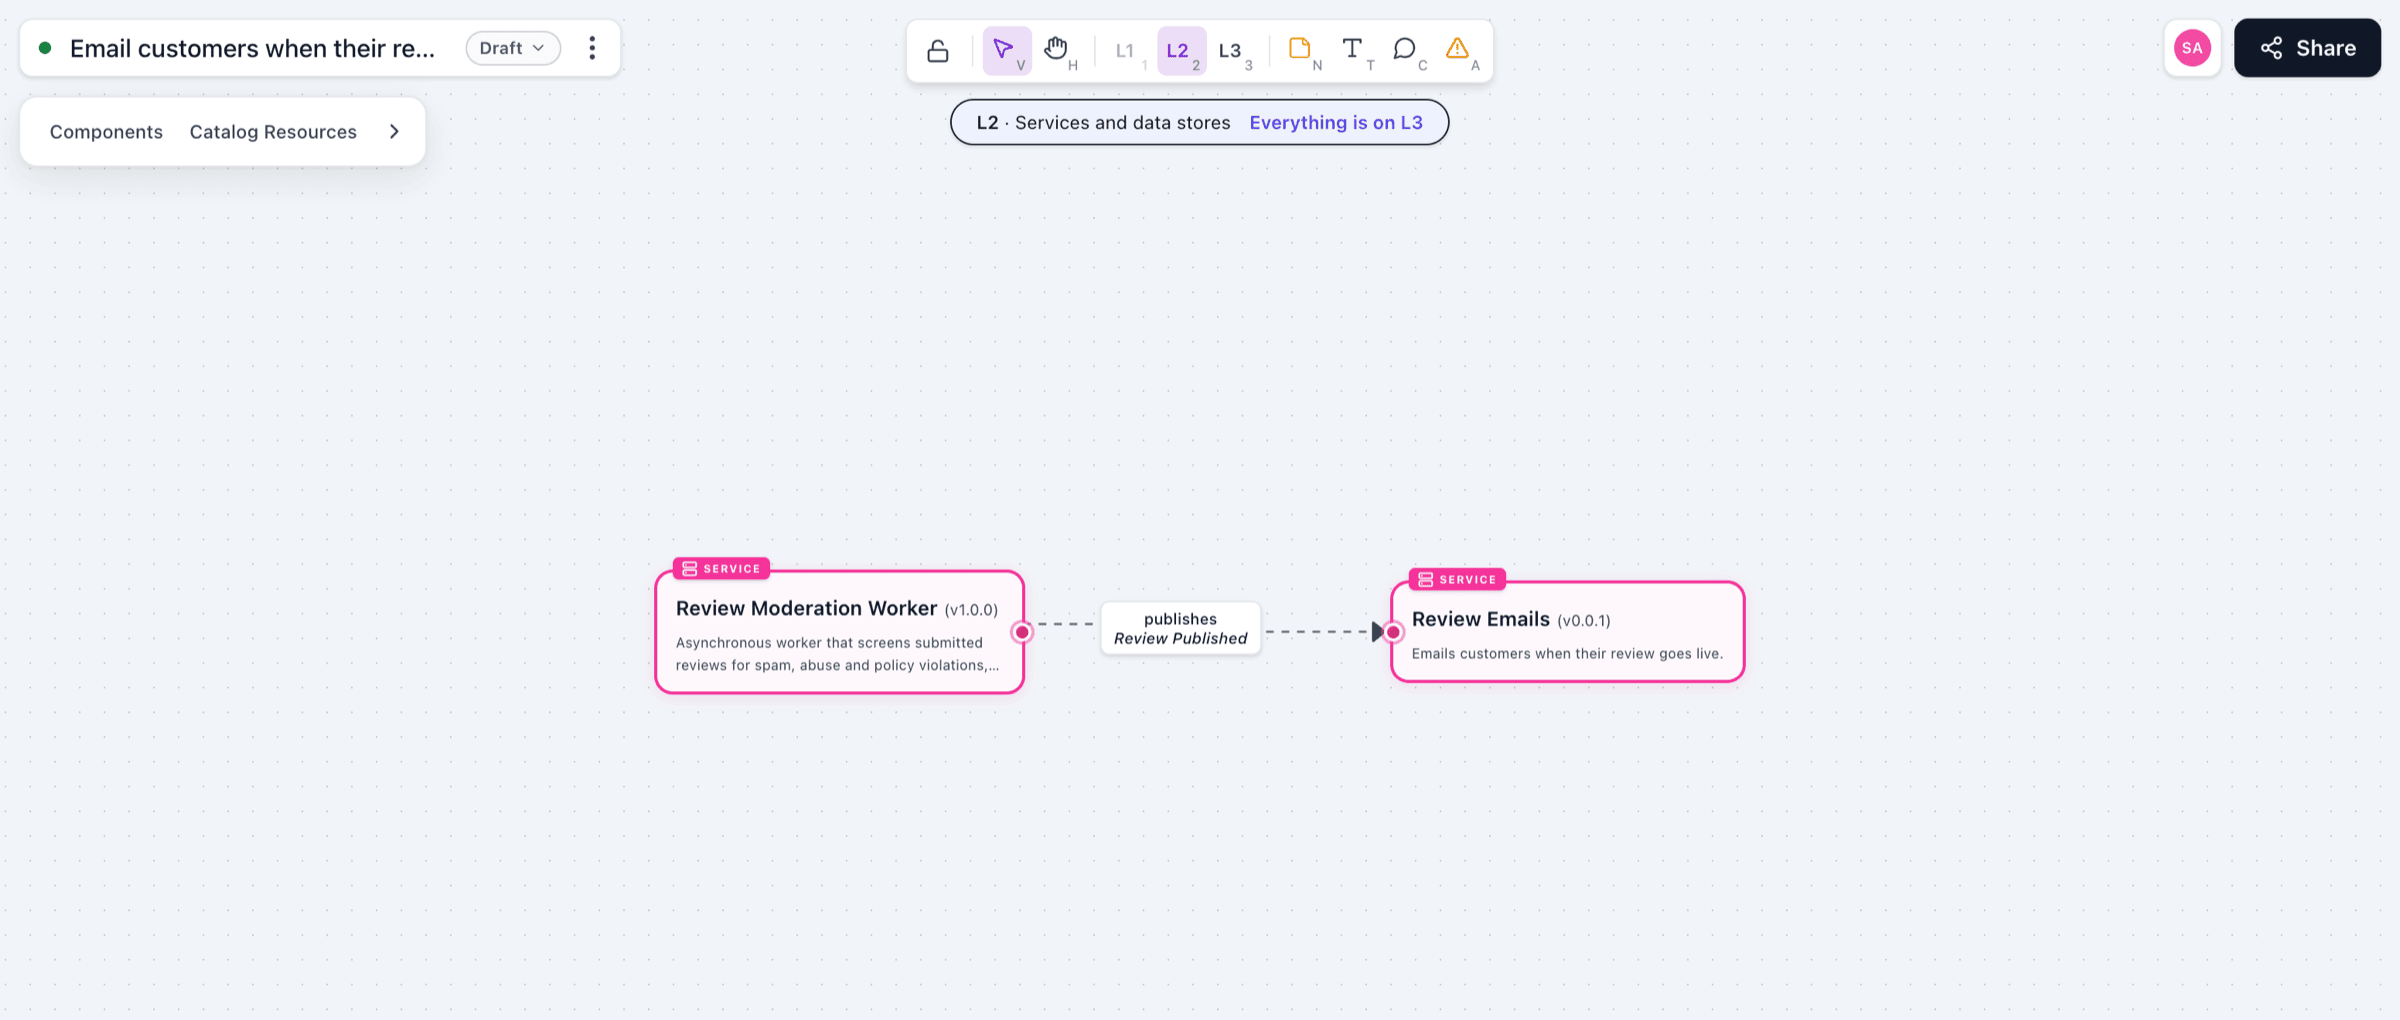
L1 is greyed out until the canvas has a domain or system.
Next steps
- Collaborate on a canvas with your team.
- Connect your agent to a canvas.